Showing posts with label Crafts. Show all posts

Wednesday, April 16, 2014

Spring Bunny Bags

Sometimes while I'm perusing Pinterest I see a project idea, that's totally adorable (like little felt Spring rabbit treat bags for Easter) and I know I want to do it.  And often one criteria for projects I choose is: It looks like a really quick project.

Because we recently discussed how my big projects --like a quilt-- can take me three years!

So quick is good.

And I think, "I will make that quick project,  it will be fabulous and wonderful!

Except I forget that I now have four children, and no matter how quick a project is supposed to be, when you're making four--it is still a substantial undertaking.

 But it's all right, because I started early enough, and hadn't given Emily back her sewing machine yet.  So we made it in time.

Four little bunny treat sacks.  

 And filled with candy. . . Sooo Cuuute!

The little part between the ears is not sewn together, so you just fill with treats and tie a bow around the ears and they stick out all cute.

(And they actually hold more than I expected.)

I liked doing different colors, and I used different fabrics for the ears and different embroidery thread for their faces.  And even tried pinking shears for cutting out the charcoal one.

They weren't tricky, except for trying to transfer where the eyes were supposed to go onto my fabric.  Maybe she had a good suggestion for how to do it in the tutorial, but I couldn't tell you, I'm not really the instruction-reading type.

So go ahead, try it!  There's plenty of time before Easter.  It's a totally cute, really quick project.

(As long as you're just making one!)

Saturday, January 26, 2013

Sewing Pit Stop

In the "bleak midwinter" I get a little SAD and find that the only thing that really gets me feeling good again is a nice project to work on.  This year I decided that now was as good a time as any to work on the quilts I started two years ago! (Not the pinwheel quilt--I finished that one last year.)

A bonus of this idea is that I have most of the supplies already lined up to go--so I didn't have to spend any  money to get started working on a big fun project right away--hooray for procrastination.  However, it wasn't too long after I started sewing circles on squares that I realized that what I needed first was the genius sewing machine pincushion idea I saw a long time ago. 

So I momentarily set aside the quilt fabric, and pulled these cute owls from my stash of leftovers. 


This pincushion is awesome.  It is in exactly the place you need it when you are pulling pins out of fabric as you sew along.  And since it is attached to the machine, you can pull pins out if it one-handed, and the pincushion stays in place. 

(Also, I'll admit here the awesomeness of having a designer for a husband--he lets me buy the more-expensive colored pearl pins because "if they improve the aesthetic experience then they're worth the added value".  And yes, they do improve my sewing experience--every time I use them I smile!)

I love projects like this that take 10 minutes and are infinitely satisfying because of their cuteness and utility.

Now, back to that stack of circles and squares. . .  

Tuesday, July 17, 2012

Wooden Wall Map (pt 1)

Jeremy and I loved these wooden wall maps I found on Pinterest.

Found here.
Found here.   Jeremy says he likes how they look like they were up on the wall of a captain's cabin or something.

We had an old map printed up, and attached it with spray adhesive to our three boards.

Jeremy sliced the map with an xacto knife (as we did some deep breathing!) and then we commenced with distressing. 

More progress coming later.

Monday, May 28, 2012

Recycled PIllow Stuffing

Back in college my sister tried this crazy idea that she had heard somewhere to stuff a pillow sham with plastic bags instead of buying a pillow for it.  I remember laying on her bed and hearing the crinkly plastic bags shift in the under-stuffed sham.  (Of course it improved with time, or more specifically--additional shopping trips.)


I remembered that idea when I came home from the thrift store with this strange tube/sack thing.  I also remembered the tip I learned watching all those episodes of Trading Spaces (back in the day when I was nursing Owen non-stop) which is to line the pillow case with flat batting before stuffing to make a smoother pillow.  So I used some batting leftover from recovering the baby's carseat, stuffed the pillow very full of plastic shopping sacks, and stitched up the end. 
     
I like the nice long rectangle shape of it to add to the mix of pillows on the bed.

Stuffed full and with the extra layer of batting it's not too crinkly, and I love the rough, speckled fabric it's made out of--though I'm still banking on a burlap pillow as well.

Wednesday, May 23, 2012

At Last Complete

 I finished my quilt!  It's finally done.  It's been a long process, but it's not even been a full year since I started--only ten months!  (Can you guess how well other projects of mine get completed around here?)
 I love this "secret" pop of fun on the back.  I'd seen fun backing details like this on other quilts, and knew I would do it on mine.  These two stripes are made up of literally the very last scraps leftover from the quilt.  24 fat quarters and I ended up with a quilt top that perfectly fit a 90x72 batting.

I quilted it with light green thread and love how it stands out from the fabric. 

But I have to admit that the thing I love the most about this project, is that I actually finished it.  Hooray!  Now I'm a "quilter."

Wednesday, May 2, 2012

Handmade Baby Shower Gift

The gift theme for the baby shower was "My Favorite Things", which really is a great theme fora first-time mom and baby. And it was actually Emily--the mom-to-be--'s idea

I decided one of my favorite things is the bapron, so I made her one (This time baby-sized and girly.)

I used the extra corner of some fabric I bought to make a classy, feminine apron for myself--luckily there was *just* enough leftover for a little bapron.  And I found a cute coordinating flannel in my stash. 

Something that was a favorite of my sisters, that she gifted to us with our last newborn was a Boon Squirt Spoon. Emily and her husband had actually seen us using the spoon at church before and thought it was the coolest thing, so I made a mental note to get one for them when they were pregnant.  The store I was at no longer sold the Boon brand, but they had this similar baby food-dispensing spoon of another brand. 

The two gifts made a great pair. 

I was happily impressed by the number of hand-made gifts she received at the shower.  She also received a hand-made quilt, some embellished cloth diaper burp rags, and a hair clip organizer ribbon, with a handful of homemade flower barrettes. 

After the shower the co-host and I were talking about this and asked: wouldn't it be cool if we could have an "all-handmade" baby shower sometime.  Obviously we'd have to be a bit selective on the invite list, but wouldn't that gift-opening everyone would enjoy watching?!

Monday, April 30, 2012

Homemade Baby Shower

Since last week was Steampunk bedroom remodel week I figured I'd make this week on the blog baby shower week, since I got to throw one for my friend last week.  (Next week will be Divergent Week in case you are wondering--that's just how my brain is working right now.)

I made a baby shower centerpiece of baby washcloth roses, using one of my oldest but still traffic-heavy tutorial on the blog.  While I was at it I added two new pictures there that help clarify a step that I always thought was lacking in the tutorial. 

 I got some cute napkins and baby washcloths and tissue paper that all coordinated.  And I got a cute little tin pail and put florist foam down int he bottom.  I used the tutorial for washcloth roses, using a bamboo skewer for stems, and cut the tissue paper in fourths and stuck them down ins between the roses. 

 I was super pleased with how cute it turned out. 

It was a fun and bright centerpeice for the shower.

Friday, January 20, 2012

Felt Heart Chain Garland

Oh, Pinterest is so much fun--isn't it?  Today I did a little project combining two different ideas I'd seen on Pinterest--folded felt hearts and a paper heart chain.

Oh, It just makes me happy.

First cut a bunch of felt strips.  I just eyeballed the cutting, but they were basically 3/4 inch by 2 3/4 of an inch.

Start the chain by sewing the first two strips together in a "V". 

Fold the Ends of the "V" down and meet them together under the point of the "V".  Add the next two strips for the next heart and sew together.  Sew through all four layers of felt about 1/8 inch from the bottom edge. 

If you are doing all one color heart this next tip isn't necessary.  If you are alternating colors I found it looked better to sandwich the two new color strips a little over the edge of the tip of the previous heart.  Then I zigzag stitched it together over that hidden edge.

I love the little hearts and different colors.

With a thicker felt, like wool felt, you could hang the garland and it should hold its shape.  This one I will use to drape around my piano-top valentines display.


I'm sharing this post here:

Thursday, January 19, 2012

Victorian-ize a Blouse

I have found a quick and easy way to modify a normal blouse to make it look more Victorian and work better for my steampunk costumes. I've done two versions now so here is my tutorial for how to steampunk a blouse. 

I start with a very structured button-up blouse.  The style was to wear blouses that looked almost like you were wearing a jacket.  I really liked a lot about this blouse, all except the turned down pointed collar which just doesn't look very Victorian at all. 

Start by flipping up the collar and cut off as much of it as you want to.  I have cut both of mine just above halfway. 

Then starting on one side tuck 1/4 inch of the raw edges to the inside and pin them all the way around.

Sew right along the edge with a machine or by hand. 

Now the collar will stand up straight giving it the feeling of a period blouse.


Me in Paris.

On my other blouse I tried to get the ruffly collar look of the Victorian era. 

Here was the collar previous to my mod.  

I cut this one down halfway as well.  To make it ruffle a little bit I pinched the fabric of the collar about every 3/4 inch and sewed little pin tucks--just sewing as close to the edge as possible to make the fabric pinch together-- alternating on the inside and the outside of the collar fabric.  I did this along the center line of the collar--not sewing the tuck all the way up to the hem.  This was enough to make the collar ruffle a bit.

Obviously there would be better ways to actually sew a Victorian blouse, but this is an easy way to mod an existing blouse to look more Victorian without needing to buy any other fabric or expend much effort at all.

Monday, December 12, 2011

More Felt Fun

Another felt project I worked on last Christmas was a set of felt food for my niece.  I had seen all sorts of fun ideas online and, made a crazy assortment with no real rhyme or reason.  My niece's favorites ended up being the sugar cookies with the little bead sprinkles on them.  I love the bowtie pasta because they are just so perfect--my sister said that when her sister-in-law was visiting, she went to pick up the pasta to throw it away and didn't realize it wasn't real until she touched it!  That's fun--and it was a great excuse for finally buying a pair of pinking shears. (Why are scissors so expensive?)

Monday, December 5, 2011

(Soon to be Non-) Unfinished Projects

Ever wonder when bloggers post about starting a project and then never post about finishing it?  Ha!  Yeah, I wonder too.  Last November I blogged about starting to make a felt advent calendar.  And then I didn't post any more about it.  So the answer to your question is "No"--I didn't finish it last year.  But I got a lot of it done and we used it for a little while--but then we were packing up to leave for Christmas anyway.

But Christmas comes every year, so I had a second chance to pull out the calendar and begin work on it again.  I never posted pictures of how far I got last year, so here they are:

 A row of six pockets and 11 ornaments.

 The snowflake is my least favorite ornament--I may end up changing it out for something else, but I love the acorn.  I made this one last year with Jonas in mind--he loved to go out on walks and pick up "atorns"!

 Pumpkin pie and name ornaments.  Obviously baby Wy needs one this year.

 Holly leaves, Christmas tree, and a wintergreen mint.

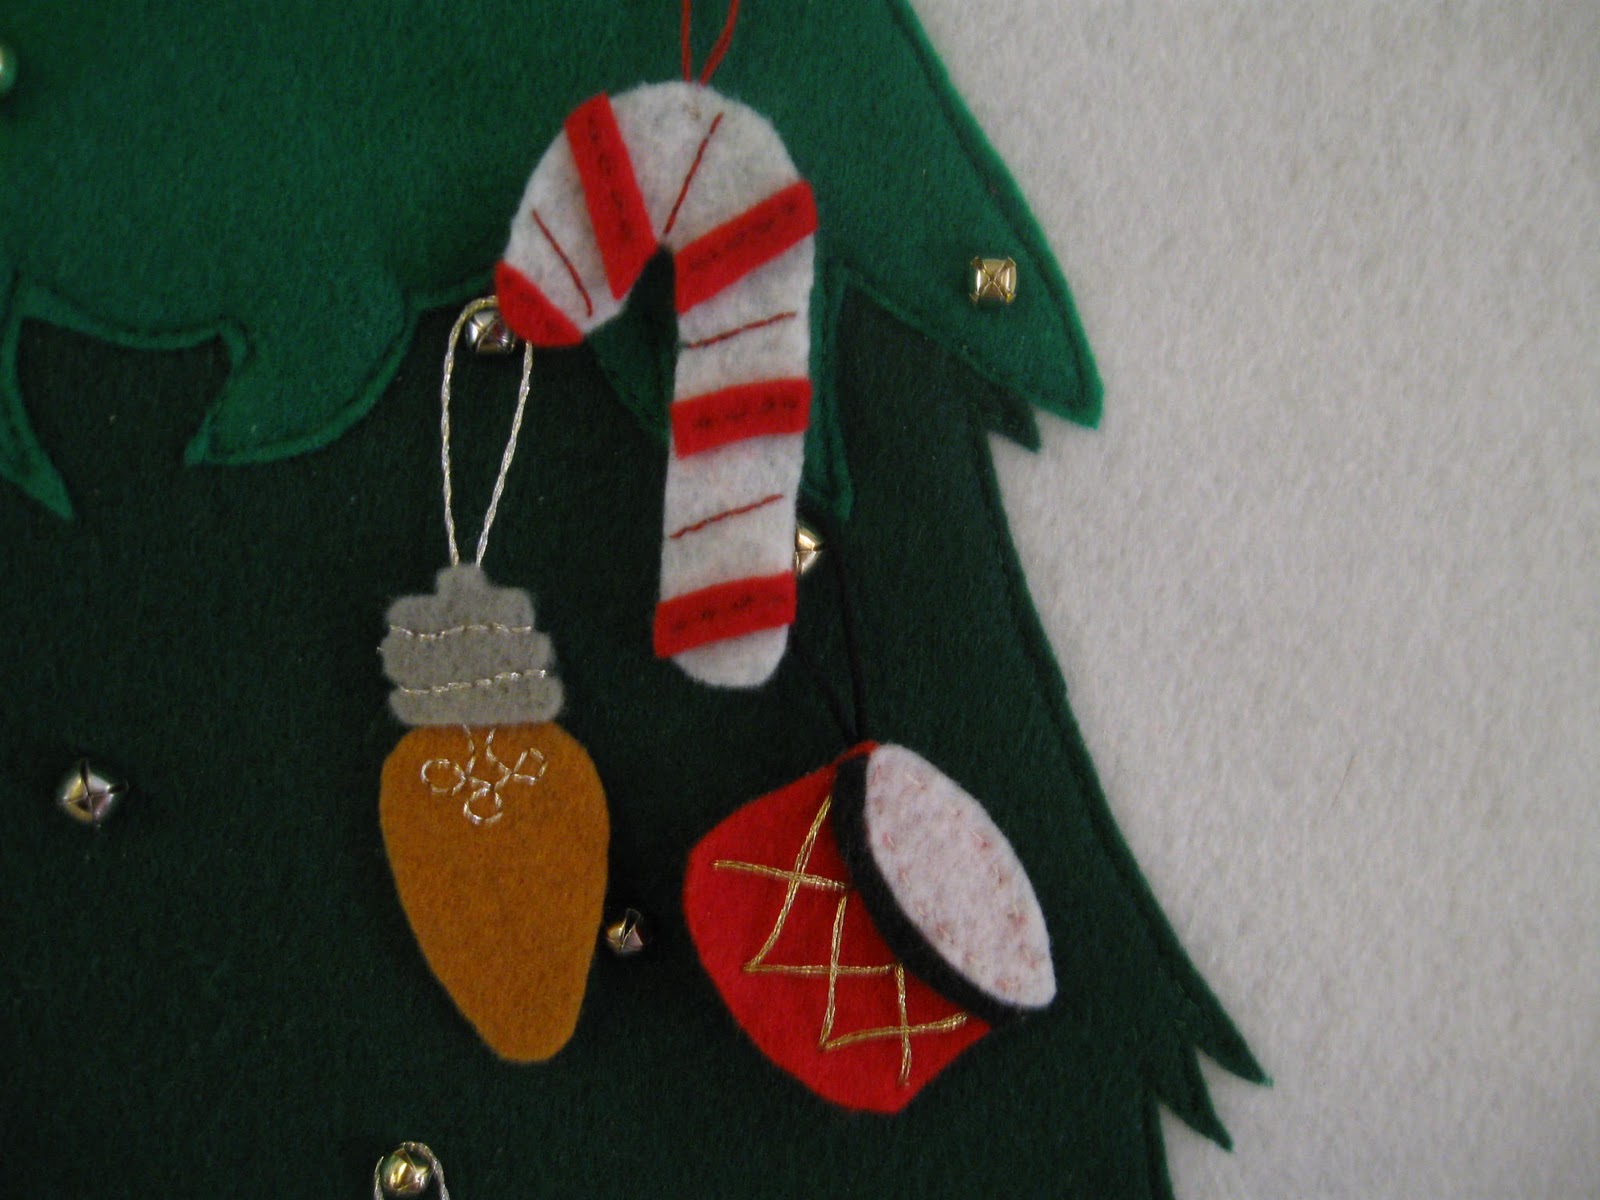
A candy cane, drum, and Christmas light. 

I put it away after Christmas and pulled it out a few weeks ago.  I haven't gotten tons more done on it, but as of December 1st this year I have now 12 pockets sewn on, and almost as many ornaments to go up.  I need to double both.  (But there's ton's of great ideas here.)

So obviously I have some more work to do, but at least I have a few weeks to do it in.  But the same problem as last year still exists--I have a lot of other holiday projects and presents I'm working on as well.  Only so many hours in the day. . .

Tuesday, October 18, 2011

Steampunk Tea Tray

 I picked up this tray a long time ago at the thrift store.  This woman was dropping off a few boxes of stuff and saw me eying it and told me I could just take it.  It wasn't the cheesy stenciled leaves and apples that caught my eye.  I was interested in it because it was wooden, and had those pretty metal handles. 

I recently decided that what it needed was a good steampunk makeover.  I started by painting the bottom of it black.

 I found a Steampunk wallpaper image from a now-defunct wallpaper website.  It was just about perfect ratios to fit in the bottom of the tray.  It looks like an old piece of folded paper with some astronomy-type diagrams and sketches on it. 

I printed the image on cardstock and Mod Podged it into the bottom of the tray.

I followed the example of Sara at The Steampunk Home and concocted a story to go with my home decor. 

It seems our heroine was studying some diagrams when she heard the bell at the front door.  Looking at the clock she realized that whomever was calling on her would be right to expect an afternoon tea.  So she distractedly gathered some jars of preserves, not realizing she left her notes at the bottom of the pile. 

Friday, October 14, 2011

I'm Done! Almost. . .


Last night I finished my quilt!  Well I finished the quilt top.  Now I have to move on to batting, backing ,and binding.  That will be a process too-I'm sure.  I still haven't decided how to back it yet.

For the most part it all worked out really well.  It was my own special style of quilting.  As I worked along (and made mistakes) I kept thinking, "I bet a real quilter would go back and fix that."  But what can I say.  I'm a casual quilter, so I made a casual quilt top. 

I used every single piece of the fabric (24 fat quarters) and kept my informal pattern going up until the very end when I had to make a concession to finish it up.  But I think it looks fine, and I am sewing together the final bits of scraps to make an accent strip through the backing--I really hope there's enough for it.

Monday, October 10, 2011

Wizards in the Backyard

Jeremy has a book of Wizard Craft that is full of projects closely resembling a lot of items and words and stories from Harry Potter, but it's not "officially" Harry Potter.  Owen has been looking through at all the projects recently and announced to me "The first thing I want is a wizard hat.  Mom, you know how to sew so that can be your job."
We went to the fabric store and picked out fabric and it really was very easy.  First we had to make a pattern from a sheet of newspaper.

We measured around Owen's head.  Multiplied that measurement by 4 then divided that number by 6.28.  That length was the length of each of the two straight sides of the hat pattern.  (see the picture) I measured them on the corner of the newspaper so they would be at a 90 degree angle from each other.  Then draw a curved line between them.  (The most precise method is to use a piece of string the right length anchor it at the point of the pattern and swing the string from one side to the other marking a curved line on the pattern.)

We pinned the pattern on the fabric and cut it out adding a half inch seam allowance.  Then we cut out a piece of interfacing the exact size of the pattern.  We ironed that on the wrong side according to the interfacing directions.  With right sides facing we sewed the two straight sides of the hat together.  Then turned it right-side out and sewed under the brim. 

Of course, even though I had asked him if he wanted one three times while I was working on Owen's and he said "no," once I was finished Jonas decided he did want one.  So (sew) repeat.

 The wizards danced with their giant marshmallow torches. . .

Around the fire pit, celebrating the first fire of the season!

LinkWithin

Related Posts with Thumbnails